How to Protect and Unprotect Excel File/Workbook/Sheet/Cells
It is important to create a password to protect your Excel file from unwanted access and editing. This article will show you the step-by-step guide to protect and unprotect Excel file, workbook, sheet and cells even you forgot the password. Tutorial will work for Microsoft Excel 2010, 2013, 3016 and 2019.
Firstly, you will need a lesson in password types of Microsoft Excel.
1. Excel file password: This password must be entered when you want to open the Excel file/workbook.
2. Excel workbook structure password: Prevent unwanted changes to the structure of the workbook, such as adding sheets.
3. Excel sheet/cells password: Control what types of changes people can make to the current sheet.
4. Set Excel workbook for Read-Only: Prevent accidental changes by asking readers to opt-in to editing.
Now let’s go through steps in each process of encryption and decryption. I will also give you the solution to unprotect/unlock Excel file, Workbook, Sheet and cells when you forgot the password.
Option 1: How to Protect Excel File by Adding a Password to It.
Solution 1: Unprotect Excel File with Password.
Solution 2: Unlock Protected Excel File when Forgot the Password.
Solution 3: Unprotect Excel File by Removing the Forgotten Password.
Option 2: How to Encrypt Excel Workbook Structure.
Solution 1: Unprotect Excel Workbook Structure with Password.
Solution 2: Unprotect Excel Workbook Structure without Password.
Option 3: How to Lock Excel Sheet and Cells.
Solution 1: Unprotect Excel Sheet/Cells with Password.
Solution 2: Unlock Protected Excel Sheet/Cells without Password.
Option 4: How to Set Excel Workbook for Read-Only.
Solution: Remove Protection for Read-Only Excel Workbook.
Option 1: How to Protect Excel File by Adding a Password to It.
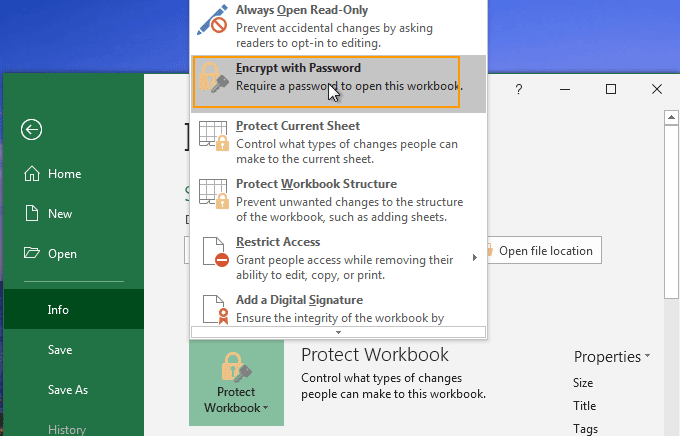
1. Open your Excel file and select “File” from menu bar.
2. Select “Info”. Click “Protect Workbook” option and select “Encrypt with Password”.
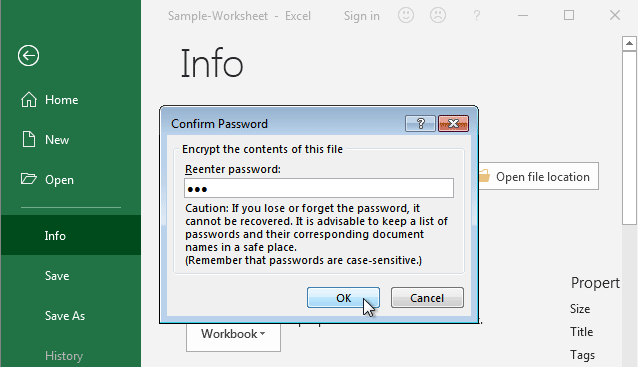
3. Enter a password and then click “OK”.

4. Reenter the password and then click “OK”.
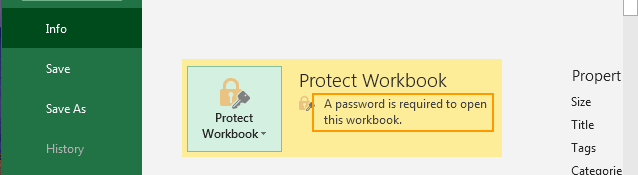
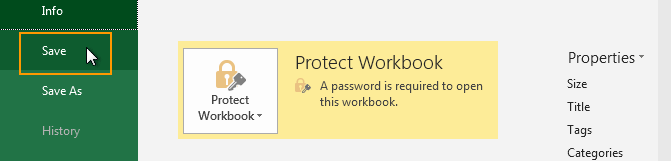
5. It will show you that a password is required to open this workbook in next time.
6. Click “Save” to save the protection.

Solution 1: Unprotect Excel File with Password.
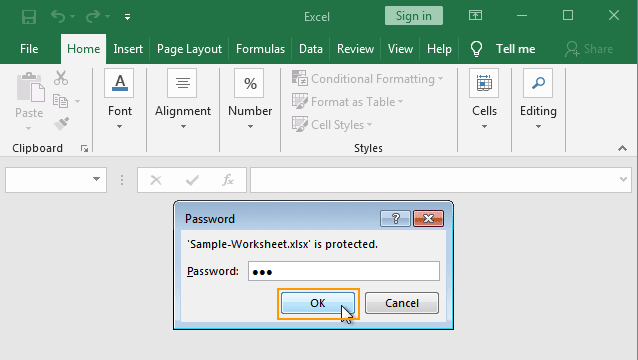
If you want to open your password protected Excel file, double click your password protected Excel file.
When it asks you to provide a password, enter your password and then click “OK” to unprotect the Excel file.
Solution 2: Unlock Protected Excel File when Forgot the Password.
If you need to unprotect your Excel file but unfortunately lost the password, you can use a fast Excel password recovery tool, Excel Password Rescuer, to quickly recover the lost password and then use the recovered password to unprotect your Excel file.
1. Download and install Excel Password Rescuer on your computer.


2. When installation process is completed, run the software. Click “Open” button to add your password protected Excel file to the software.

3. When a dialog pops up, select your protected Excel file and then click “Open”.

4. Excel Password Rescuer provides four powerful password attacking types to greatly reduce the recovery time. Choose an appropriate attack method from pull down list and choose character range if you need.

5. Click “Start” to recover lost password for your selected Excel file.

6. For a moment, the software will find out the original password for you. Copy it and then use it to unprotect your Excel file easily.

Solution 3: Unprotect Excel File by Removing the Forgotten Password.
If you want to quickly unprotect an encrypted Excel xls file without password, you can use Excel Password Eraser to instantly remove password protection for your encrypted Excel file.
1. Download and install Excel Password Eraser on your computer.
2. When you finish installation in seconds, launch the software. Click “Open” button to add your encrypted Excel file to the program.

3. When “Open file…” dialog pops up, navigate to your encrypted file. Select it and then click “Open”.

4. Simply click “Remove Password” to remove password protection for your Excel file in seconds.

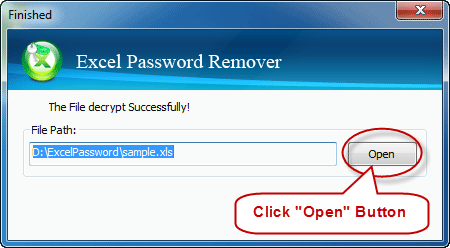
5. When it prompts you that the file is decrypted successfully, click “Open” to open your Excel file without password.
Option 2: How to Encrypt Excel Workbook Structure.
1. Open your Excel Workbook, select “Review” from menu bar and then click “Protect Workbook”.

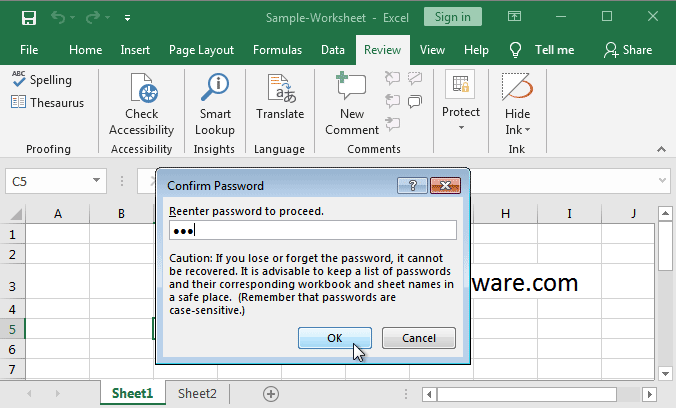
2. When a dialog pops up, enter a new password and then click “OK”.

3. Reenter the password and then click “OK”.
4. Click “Save” to save the password protection for workbook structure.

Solution 1: Unprotect Excel Workbook Structure with Password.
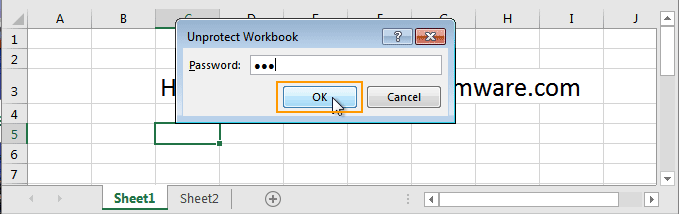
1. Open your Excel file whose workbook was protected with password, click “Review” from menu and select “Protect Workbook”.

2. When a password dialog appears, type in your password and click “OK”. All worksheets in the Excel file will be unprotected.
Solution 2: Unprotect Excel Workbook Structure without Password.
Note, if you have set a password to prevent users selecting locked cells and unlocked cells, this method will be useless.
1. Open your Excel workbook which is protected with a password. Click on the top left corner to select all cells.
2. Right-click on the cells and select “Copy”.
3. Create a new blank Excel file.

4. Open the new Excel Workbook and paste the copied content in it.
5. Save your new workbook. If the original Excel file contains more than one sheet, you will need to add more sheets in your new Excel workbook and then paste the copied contents to the new sheets as well.
Option 3: How to Lock Excel Sheet and Cells.
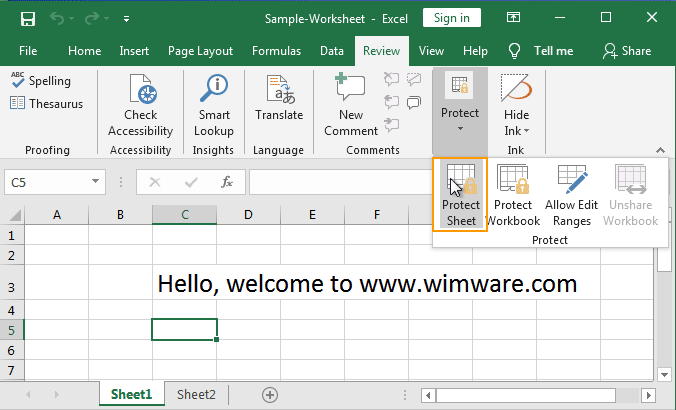
1. Open your Excel Workbook, select “Review” from menu bar and then click “Protect Sheet”.
2. When a dialog pops up, select what you allow users to do with the sheets and cells. Then enter a new password and click “OK”.
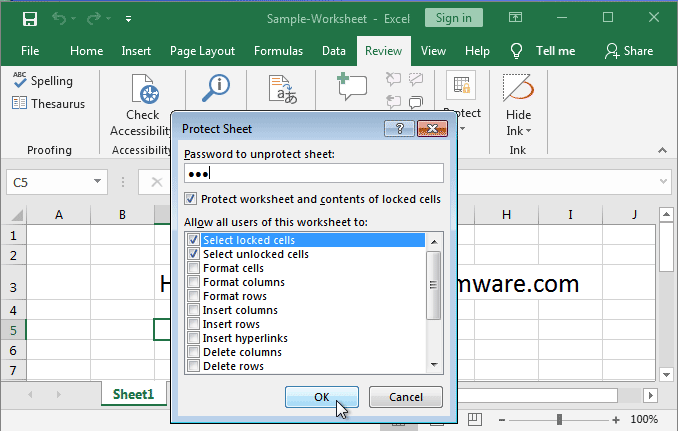
3. Reenter the password and then click “OK”.
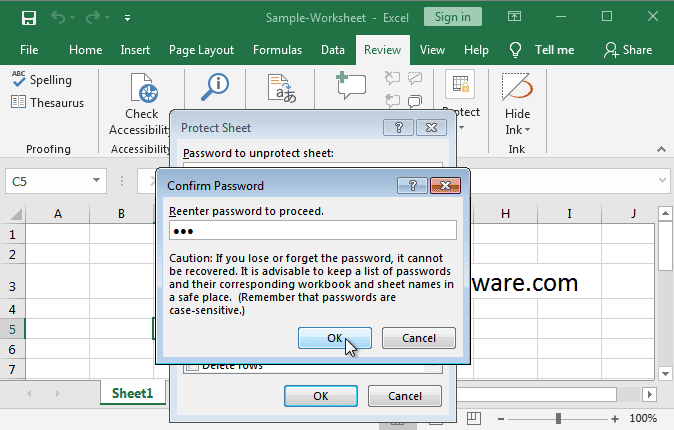
4. Click “Save” to save the password protection for current Sheet and Cells.

Solution 1: Unprotect Excel Sheet/Cells with Password.
1. Open your Excel workbook whose sheet and cells are protected with a password, click “Review” from menu bar and select “Unprotect Sheet”.

2. When it requires you to provide a password, enter your password and click OK. If you don’t need to lock the sheet and cells, save your changes.

Solution 2: Unlock Protected Excel Sheet/Cells without Password.
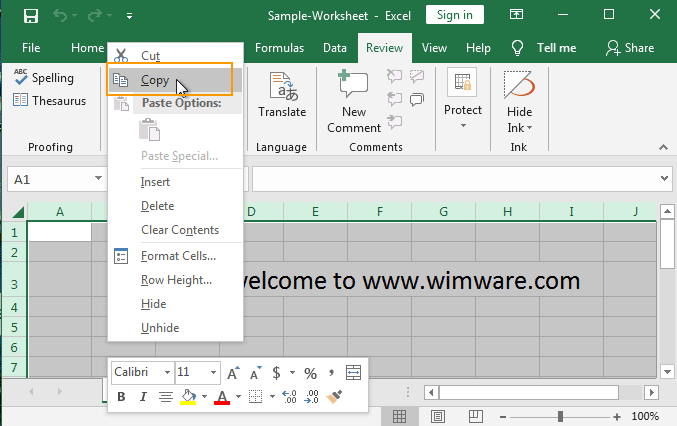
It is similar to unprotecting Excel workbook Structure. If you have set a password to prevent users selecting locked cells and unlocked cells, this method will be useless.
1. Open your Excel workbook whose sheet and cells are locked. Click on the top left corner to select all cells.
2. Right-click any cell and select “Copy”.
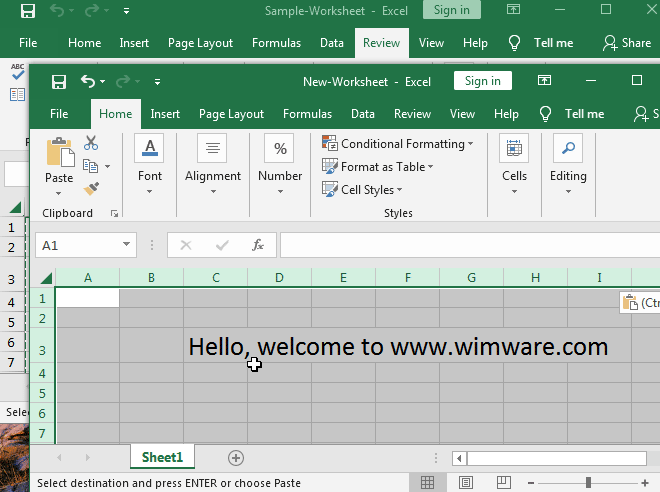
3. Create a new blank Excel file.
4. Open the new workbook and paste the copied content in the sheet of the new workbook.
5. Save your new workbook. Now you can make changes to the new Excel workbook without any password but not your old file.
Option 4: How to Set Excel Workbook for Read-Only.
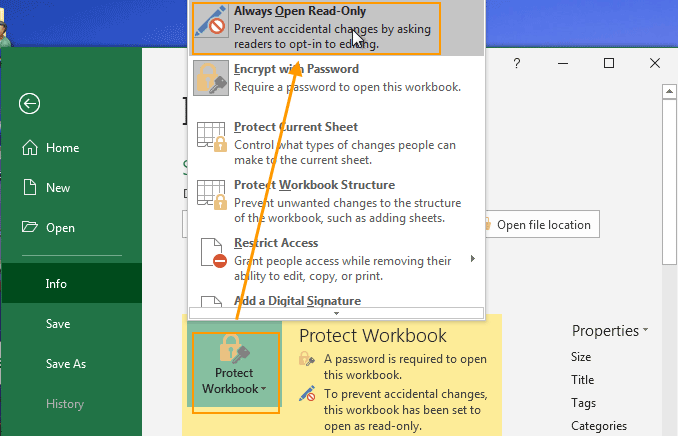
1. Open your Excel workbook and then select “File” from menu bar. Select “Info”, then click “Protect Workbook” and select “Always Open Read-Only”.
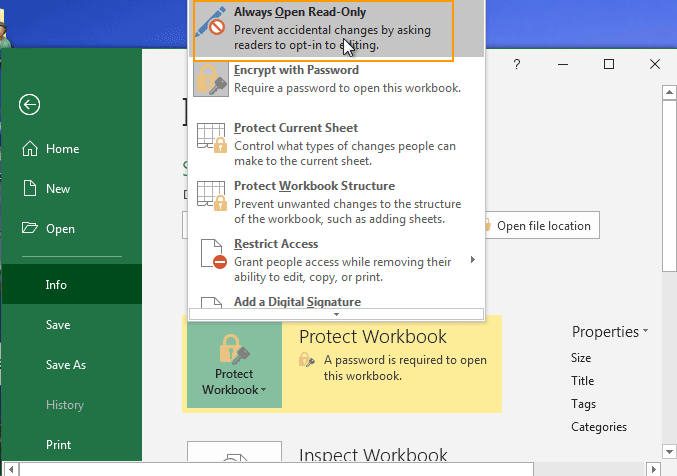
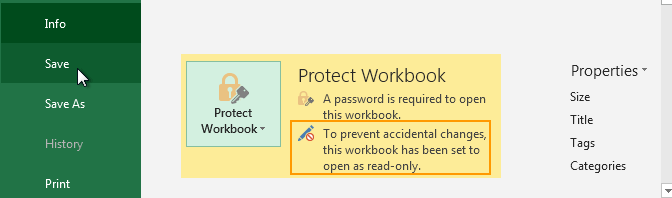
2. It will show you that workbook has been set to open as read-only.
Solution: Remove Protection for Read-Only Excel Workbook.
If you want to remove protection for Read-Only Excel Workbook for editing, follow the steps bellow.
1. Double click your Read-Only Excel file, when it asks you if open as read-only, click “No”.
2. Select “File” from menu bar and click “Info”. Then click “Protect Workbook” and select “Always Open Read-Only” to remove protection.
3. Click “Save” to save changes.
Price: $ 17.95